
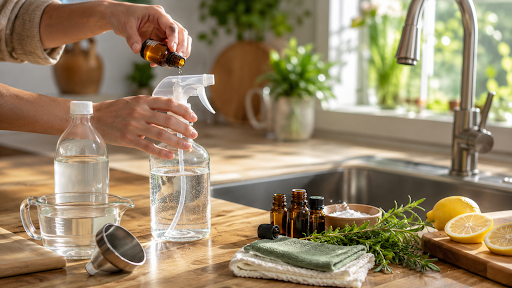
On Tuesday last I ran out of spray cleaner, mid-wipe. Coffee grounds everywhere, dishes in the sink, and an empty coffee cup in my hand. It was a ridiculous thing to do to drive to the store for that. So I used the vinegar and some old spray bottles under the sink instead. Ten minutes, zero dollars spent, and the counter’s clean. That’s really the whole appeal here: you already have most of a DIY all-purpose cleaner sitting in your kitchen; you just don’t know it yet. No store run. No ingredient list you need a chemistry degree for. No six-dollar bottle that’s basically water in a nicer bottle than yours. What You Actually Need Not much. That’s the whole list, more or less. No hunting three stores for borax like some recipes want you to. Vinegar’s the acid doing the actual work it’s what cuts grease, soap scum, and hard water spots on your faucet. Water’s just there to keep it from smelling like a salad every time you wipe a counter down. The Recipe I Actually Use Add 1 cup of water, 1 cup of white vinegar and 10 drops of essential oil (if desired) to a spray bottle. Pour in the water, then the vinegar, then the oil, and then shake it.That’s it I know it sounds too simple to work, but it does. My kid made a batch of this by herself last month. She’s eight. A grease-cutting version: Plain vinegar water doesn’t always cut it once your stovetop’s seen a few weeks of real cooking, though. For that, toss in a teaspoon of dish soap it grabs onto grease in a way vinegar just can’t on its own, and the two together will get through a grimy oven door without you needing to scrub like you’re mad at it. Where You Should Never, Ever Use This Okay, this part actually matters, so stick with me a second. Vinegar and natural stone don’t mix, though. Granite, marble, limestone, travertine keep spraying vinegar on that stuff and eventually the finish dulls, clouds up, sometimes etches outright. Will one accidental spritz ruin your counter tonight? No. But it’s your call whether that’s a risk worth taking on something you paid a few thousand dollars for. Got stone counters? Warm water and a drop of dish soap that’s your move there. Essential Oils, If You Want Them Straight vinegar smells like vinegar. It fades fast once it dries, but I get it some people can’t stand cleaning with that smell hanging in the air. Lemons and oranges get picked most often; they’re bright, clean-smelling, and they’ll even chip in a little grease-cutting of their own. Lavender’s the calmer option and works well in a bathroom. Tea tree oil has that sharp, almost medicinal smell for some reason people love it specifically in laundry rooms. And keep it away from cats essential oils and cats really don’t mix. Tea tree oil especially isn’t safe for them, even in tiny amounts. Shelf Life and Storage Before you need to make a new batch, it is around three to six months. The product doesn’t go bad as food will, but the scent will fade, and so will some of the cleaning power. Store the bottle under the sink or in a cabinet, out of sunlight as UV rays destroy essential oils quickly. Around the House Kitchen: counters, the outside of the fridge, cabinet fronts, a cooled-down stovetop. Skip cast iron and stone. For everything else, spray it, let it sit a second on the stubborn spots, wipe dry. Bathroom: soap scum on shower walls, the outside of the toilet, sink, mirrors too though for mirrors, grab newspaper instead of paper towels if you want to skip the streaks. Paper towels and mirrors are a bad combo; you’ll be redoing it twice Here’s a spot most people skip entirely: door handles, light switches, and remote controls. They get touched constantly and cleaned almost never. Thirty seconds a week fixes that. Is It Actually Cheaper Than Store-Bought? Indeed, in fact, it is much cheaper. A branded spray bottle costs between five to seven dollars then costs approximately four dollars per gallon of white vinegar which gives you around sixteen similar bottles.Do that math over a year of cleaning, and it adds up fast. There’s also the ingredient thing: no vague “fragrance” hiding a chemical blend on the label, no dyes, nothing you need a chemistry degree to identify. If you’ve got kids or pets rolling around on floors right after you mop, I don’t know, that just feels better. That said, store-bought isn’t obsolete. If you actually need to disinfect against something flu season, after handling raw chicken you want a product registered with the Environmental Protection Agency for that job specifically. Just Try It This Week Skip the store run. Grab the vinegar you’ve already got, an empty bottle, and five minutes you weren’t using anyway. Once your DIY all-purpose cleaner handles your counters and mirrors and sinks just fine, that store-bought bottle under your sink is probably going to sit there a lot longer than it used to. I switched over almost a year ago now, mostly by accident, and I haven’t gone back. Not because I’m precious about it if I run out of vinegar mid-week, I’ll still grab whatever’s on the shelf at the store. It’s just that most days, this is the easier option, not the harder one. That’s the part people get wrong about “natural” cleaning. It’s not a chore. It’s actually less of one. FAQ Is a DIY all-purpose cleaner as good as store-bought? For regular dirt and grease, honestly, yeah, pretty much. Where it falls short is disinfecting—flu season, after touching raw chicken, that kind of thing. Can I use it on wood floors? Sealed wood, sure, but go easy on it. Older or unsealed floors don’t love repeated vinegar exposure; they can warp or dull over time. A barely-damp mop is the safer
Spring Cleaning Checklist: A Room-by-Room Guide That Won’t Eat Your Whole Weekend
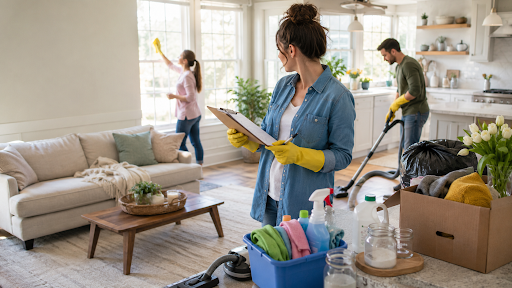
Winter always wrecks the place. There’s salt crusted by the front door that never quite scrubs off, a junk drawer that’s somehow multiplied into two, and windows so filmy you have to step outside just to confirm it’s actually sunny. Then there’s the mud tracked in from every boot that’s touched the driveway since November, and a coat closet where mittens go to become orphans you find the left one in March and never see its match again. At some point “tidy up” stops covering it. Here’s a spring cleaning checklist that goes room by room, so you’re not still standing in the kitchen at 9 p.m. wondering where the day went. You don’t have to knock this out in a single weekend, most people don’t, honestly. The ones who try usually give up halfway through the bathroom, worn out and cranky, with three rooms still untouched. Spread it out instead. Cross things off as you go. That’s the whole trick, really small, steady progress beats one exhausting marathon every time. Build Your Spring Cleaning Supplies List First Nothing kills your momentum like starting in the bathroom and finding out the glass cleaner is empty or realizing halfway through dusting that you’re out of trash bags. So before you start, run through this spring cleaning supplies list and see what you actually have on hand: You probably have most of this already. The donation box is the one thing people skip and it’s the one that matters most. Really, half of spring cleaning just comes down to deciding what leaves the house for good. If you can’t remember the last time you used something, that’s your answer. The Room-by-Room Spring Cleaning Checklist Pick a room and finish it before you touch another one. The second you start bouncing around half the kitchen, then the closet calls your name, then back to the kitchen that’s how a two-hour job eats your whole Saturday. Kitchen Clear the counters first. Empty. All of it. Wipe down the cabinet fronts, especially near the stove grease sneaks up on you there. Toss anything expired from the fridge it’s in there somewhere, hiding behind the condiments, it always is. Shelves are empty, so wipe them down now; crumbs and sticky spots harden fast once they’ve had a few weeks. Oven racks go in the sink to soak while you work through the rest of the kitchen. Then get behind or underneath the fridge and vacuum out the coils. Nobody thinks about those coils, but a dusty fridge works overtime, and that’s just money leaking out through your electric bill. Bathrooms Empty the medicine cabinet and toss anything expired. Grout looking grey? Baking soda paste, a little elbow grease, done. The shower curtain or liner goes through a gentle wash cycle. Don’t forget the light fixtures and the exhaust fan cover; they’re dust magnets nobody remembers to clean. And while you’re in there, open the cabinet under the sink and admit you’re never using that hotel lotion from three years ago. Bedrooms and Closets Flip or rotate the mattress. Pillows with washable tags go in the machine. Then the closet, anything you haven’t worn in a year comes out. No exceptions. Yes, even that shirt. You know the one. Vacuum under the bed, where dust bunnies tend to throw their own little party. Don’t forget the baseboards, either it takes maybe five minutes, and somehow people skip it for years at a stretch. Living Room and Common Areas Pull the couch cushions up and vacuum underneath, then hit the couch itself you’d be surprised what turns up down there. Start high with the ceiling fans and light fixtures that way, whatever dust falls lands on surfaces you’re already about to wipe down. Don’t skip the remote controls, light switches, and door handles. You touch these things fifty times a day and wipe them down maybe never, which is exactly why they’re crawling with more germs than your toilet seat. Windows, Floors, and the Stuff You Skip If they are accessible, wash your windows both inside and out. If they are out of your reach, pay for the work. Get an old toothbrush to clean the tracks; dust and dead bugs accumulate here all winter long and many people don’t really want to take a closer look. Clean your floors thoroughly. Use mop for tiles and steam cleaner for carpets. Also, wash your drapes and blinds as they hold much dust as well as allergens which people fail to notice until much later. A Realistic Spring Cleaning Schedule Most people don’t have a free weekend to burn on this. So don’t try to. Break it up over five or six days instead, one room a day. Kitchen on Monday. Bathrooms on Tuesday. Bedrooms on Wednesday. That’s an hour or two a day, tops, and the whole house is done inside a week, no burnout, no wasted Saturday. Got other people in the house? Don’t do this solo. Hand out rooms. A family of four can knock out this entire checklist in one afternoon if everyone grabs a zone, and it turns into less of a chore and more of a group project. Deep Cleaning Tasks You Can Skip Some Years Not everything on a deep cleaning checklist needs doing every single spring. If you’ve got pets or allergies, steam cleaning the carpet is worth doing every single year. Otherwise, every other year is fine. The same goes for washing every wall and baseboard in the house worth doing well, just not worth doing every season. The American Cleaning Institute says most households spread spring cleaning chores across about six days, instead of tackling it all in one go. That lines up with pretty much everything above see their spring-cleaning guide here. Want a version of this spring cleaning checklist you can print and stick on the fridge? Check out our home organization guides for printable versions and room-by-room breakdowns. Frequently Asked Questions Do you think it